
Business Continuity Part 2
As a continuation of our multi-part series on developing your own Business Continuity and Disaster Recovery plans, we will transition to installing, running, and familiarizing ourselves with the tool we will use to create our plans.
Installing the Tool
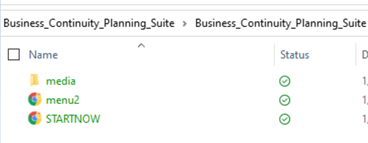
When you download the Business Continuity Planning Suite tool, you will want to save the zip file to wherever you intend to run the tool. I find it convenient to work from my Desktop and then move the folder elsewhere when I am “done”. And after I right click and extract the zip file, I have a new folder with the unzipped contents.
You want to navigate to the “Business_Continuity_Planning_Suite” subfolder and open the .html file labeled conveniently, “STARTNOW”.
After you double-click the file to run it, you should end up on a web page in your browser (I’m using Google Chrome) that looks like this:
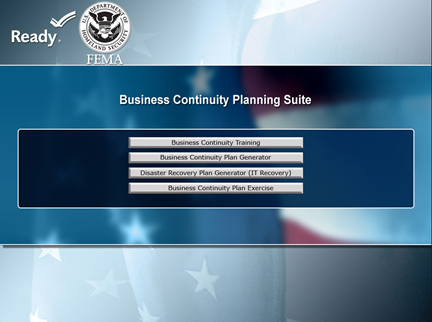
On occasion, given the age of this tool, you may find some broken links where DHS/FEMA have not maintained the live site, but we will ignore those and use the other relevant parts of the tool. For example, the link the Business Continuity Training does not work.
We will also set aside the Business Continuity Plan Exercise component for now and most likely revisit that in a later article. We need to build our plans before we can test them, after all. That means our conversation for now will focus on using the Business Continuity Plan Generator and the Disaster Recovery Plan Generator (IT Recovery).
Timeout to Consider Business Models
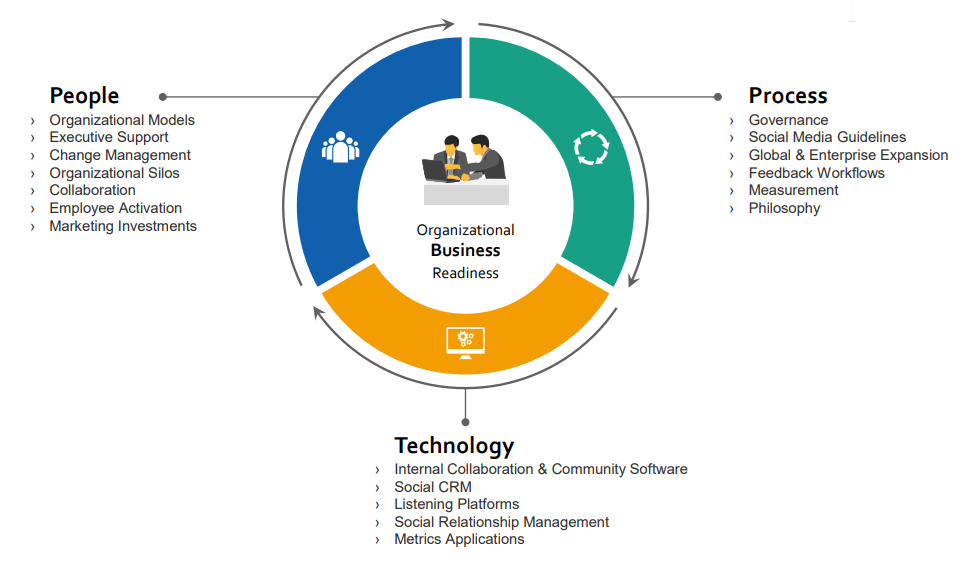
Before we go further, it is helpful to think of BCDR relative to a mental model of your business. This model makes it easier for us to categorize what “things” might be at risk to some internal or external threat and vulnerability. I like the use the People, Process, and Technology (PPT) model as represented below. This helps me think about the business in an organized way to define what areas should be addressed in the plan.
Running the App
Let’s start with clicking the button for the Business Continuity Plan Generator. We will come back to the Disaster Recovery piece later in this blog series. Clicking the link will run an executable (.exe) file in your extracted folder and you will be prompted to extract this component of the tool. I chose the default location of saving it in the top level of our main unzipped app folder. This results in a subfolder called “Business_Continuity_Plan_Extract”. Within that folder is an application labeled “Business_Continuity_Plan”. This is the main app we will use throughout the development of our plan. When you run the app for the first time you will be prompted to create a user account.
Instructions
Since the app does a great job of stepping you through the process of using the tool to generate your plan, we will not reinvent the wheel in that respect. Simply click on the Instructions link to pull up the document. I will instead spend the rest of our time providing commentary on the different sections.
Checklist
Before we move on to the main part of the app, we want to look at the checklist. Selecting Checklist from the menu will bring this up. Now is a good time to detail the information that needs to be collected before you start working on your plan. The following comes straight from the software checklist:
- The name and address of the facility or business site for which this plan is being generated
- Your company’s organization chart
- Your organization’s confidentiality requirements
- Your organization’s Business Continuity Plan Policy and Emergency Response Plan
- A list of your organization’s mission critical:
- Equipment
- Software
- Supplies list
- Vital records
- Business processes and interdependencies
- The address and contact phone number in the event of a declared disaster for your:
- Identified business recovery center
- Designated emergency operations center(s)
- Alternate site and offsite storage locations
- The name and contact information of your organization’s:
- Executive Management Team
- Security Team
- Business Continuity Coordinator
- Damage Assessment/Salvage Team
- Logistics/Transportation Team
- PR/Communications/Marketing Team
- Facilities/Security Team
- IT/Telecommunications Team
- Finance/Accounting Team
- Human Resources Team
- A list of your organization’s contact information, account numbers, and points of contact where applicable for:
- Vendors
- Customers
- Fire
- Police
- Ambulance
- Hospital
- Poison
- Control Center
- Chemical Release
- Electric Company
- Gas Company
- Water Company
- Internet Service Provider
- Wireless Service Provider
- Security Company
- IT Support Provider
Feel free to customize these lists to your organization’s needs. The goal here is to gather as much of this information as you can at the start to save time later when you will copy and paste these details into your plan template. As you will notice from the checklist, there are ten (10) teams named. This will be too many for a small organization, so you may want to keep the teams in name only or combine them. The important part is these functions exist in the plan and each group/role is clearly defined and assigned to your personnel. It will be common for a person in a smaller organization to wear multiple hats and represent different functions on more than one team.
Start Now
When we arrive at this step by clicking the Start Now button, you will be prompted to give your new plan a name along with a password. While it is possible to manage multiple plans this way, perhaps for different sites or divisions with an organization, we will assume one plan is sufficient. I am using the same password for the plan as I did for the application account, but you could make these different if multiple teams were sharing the same instance of the application. From now on when you open the app, your plan document name will be available in a drop-down to select each time.
Now that you are in the core part of the application, a high-level overview of the process can be seen by navigating to the Sitemap section.
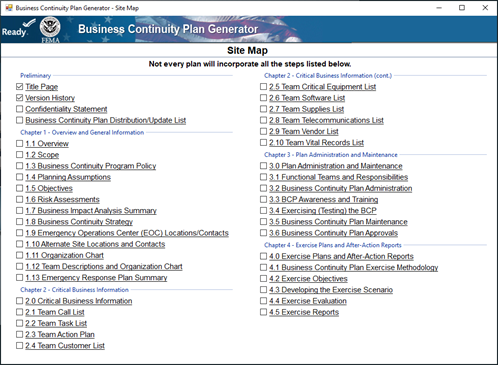
As you can begin to appreciate, there are many steps and sections to developing a comprehensive plan. I will stress again the importance of scheduling time to work on smaller bits of this over time. Rome was not built in a day and neither is an effective Business Continuity plan. Fortunately, the rest of the process follows a simple (and did I mention lengthy?) wizard and template flow, prompting completion of one section at a time. You can, however, skip around using the Site Map if you want to focus on particular sections out of order. There is no right or wrong to this, simply devoting the time and energy to getting it done. It will be helpful possibly to delegate some of the work to those who can perform guided data entry and others to come back and review the information. Whatever works best for your team.
Taking a peek at the Resources section is also helpful, but we will call out relevant appendices when they are part of the main section being discussed. The glossary is handy when particular terms or acryonyms are unclear. We will do our best to define any of these in the context of the article as we move forward.
This is probably a good time to remind you to be sure the main folder and its contents are being backed up regularly. For me this means my Desktop and other user profile folders on my laptop are being synced to my M365 OneDrive cloud storage and Service manages a cloud-to-cloud backup of that environment from there. This allows me to work how I want but still take comfort that my work is being protected. After all, effective backups is all part of a good Business Continuity plan. When I am finished with the final version, I will likely move the folder to a MS Teams share where Management can have access to the plan and make revisions over time. At that point, we will have moved from the initial project phase to the ongoing testing and maintenance of the plan. Much like anything with security & compliance, this is a journey not a destination.
From here on we will divide up the article into chapters corresponding to the various sections outlined in the Site Map and we will refer to the Business Continuity Plan Generator as BCPG.
 Thinkstock
  Krakenimages by Shutterstock


 Credit: N. Hanacek/NIST


